Pages


26 Sept 2011

Eastern Regional League Winners are announced for 2010/2011


This years British Showjumping Regional Intro Leagues have now drawn to a close with the league winners now announced – congratulations to our local winners competing in the Eastern League!Competitors have been picking up points across the country at Intro shows hoping to top the leader board for their region. This year, all winners of these leagues will be collecting their awards at the British Showjumping Awards Ball this October.
Essex riders were well represented; some great results included Southend on Sea based Toni Evans winning both the junior 1m and junior 90cm and Hornchurch based Brian Young winning the senior 80cm with his wife’s fourteen year old mare, Lysia.
The winners of the 2010/2011 Eastern Regional Leagues are;

Absolute Horse League

  • Senior 1m: DRUMHOWAN CAVALIER and Mrs Michaela Huntington
  • Senior 90cm: PHANTOM DREAMAKER and Miss Hannah Vincent
  • Senior 80cm: LYSIA and Mr Brian Young
  • Senior 70cm: APACHE DISCOVERY and Miss Jess Joslin
  • Junior 1m: FANTASIA ICE and Miss Toni Evans
  • Junior 90cm: CARRBROOK SPECIAL EDITION and Miss Toni Evans
  • Junior 80cm: JUST MALCOLM and Miss Ruth Gayton
  • Junior 70cm: JAYS GIRL II and Miss Hallie Lunn

Chiltern & Thames League

  • Senior 1m: CARLINGFORDS TOUCH and Miss Charlotte Edwards
  • Senior 90cm: TARA III and Miss Fiona Christian
  • Senior 80cm: TARA III and Miss Fiona Christian
  • Senior 70cm: COSMIC GIRL II and Mr Seb Sharpe
  • Junior 1m: JUST A DASH and Miss Abbie Mccullock
  • Junior 90cm: BONNY DUCHESS and Master Sebastian Bishop
  • Junior 80cm: DUNCRYNES JUNGLE BUNNY and Miss Katie Waldock-Smith
  • Junior 70cm: WEYDOWN SUNFLOWER and Miss Katie Waldock-Smith
This is the last year that the regional leagues will run as they will be now replaced by the Club Membership Regional Leagues. These new Club leagues run across the eight regions which are Scotland, Northern, West Midlands, Wales, East Midlands, East, South East and the South West.
The club leagues run from the 1st June through 31stMay and will enjoy their own regional championships during the summer from 2012 onwards. The leagues host a 70cm, 80cm, 90cm and 1m for both ponies and horses with points been awarded for placings and double clears.
Read more about the Eastern Regional winners by clicking here.

16 Sept 2011

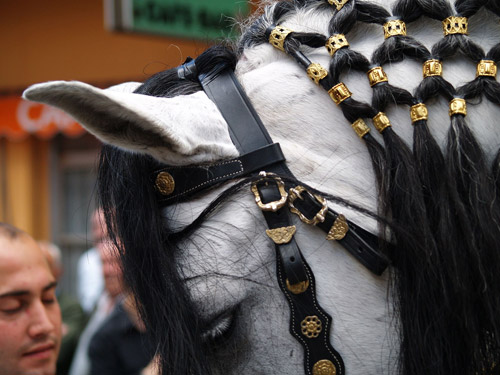
Braiding Tails and manes

To achieve the best results you need a full, untrimmed tail with plenty of length to the hairs at the top of the tail. The secret of success is to keep the hairs evenly spaced. Try to include an even amount of hair from each side, all the way down the length of the dock. The braid formed down the center of the tail must be kept straight and tidy for maximum effect.
                     
                                   Take sections from both sides.             Braid down center for two thirds of dock.

The finished tail looks neat and tidy with the actual braid kept centrally spaced down the tail.


Managing Mane Braiding


If you grew up riding hunters 20 years ago, chances are you mastered the art of braiding a hunter’s mane. It was simply part of a show horse’s turnout. But with non-rated divisions allowing today’s riders to forego braiding, the ability to braid well is disappearing.  A beautiful coiffure on a modern show hunter is now often left to the skillful hands of a professional groom. However, you can still make your horse look like a national champion, even if you’re competing at a schooling show. Just follow these step-by-step tips.
Horse Mane Braiding Tools

Assemble an assortment of braiding tools: 4-ply yarn cut into strips 12-inches long (for our photographic purposes, we’re using a contrasting color), a latch hook (bought at any craft store), a plastic alligator hair clip, a mane comb, scissors and a spray bottle of water mixed with a styling gel or braiding solution.

Make sure you’re braiding a mane that’s freshly shampooed, free of coat polish—that’ll only make it slick—and pulled and thinned to about 4 inches.

Thoroughly dampen the first third of the mane with the solution.

Horse Mane Braiding ToolsUsing the comb, make a part about one-inch wide. Each braid needs to be the same width against the top of the horse’s crest. Snap the clip on the neighboring hair to hold it out of your way.

Horse Mane Braiding ToolsBegin braiding. Keep even tension on the hair, making sure that you pull down on the mane as you braid. If you pull the hair toward you, the finished braids will stand away from the horse’s neck.

Horse Mane Braiding ToolsAbout half-way to the end of the braid, add a piece of yarn that’s folded in half.

Horse Mane Braiding ToolsMeticulous braiders make a note of how many crossovers they make in a braid before they add the yarn. This adds a consistent look to the finished job.

Horse Mane Braiding ToolsSplit the yarn tails so that they each go in separate sections of the braid ..

Horse Mane Braiding Tools… then braid all the way to the end of the hair.

Horse Mane Braiding ToolsWrap both yarn tails around the braid and knot once. Make sure you pinch the end of the braid with the fingers of one hand while you knot with the other. This will prevent the braid from unraveling.

Tying the Knot
Horse Mane Braiding ToolsHorse Mane Braiding ToolsHorse Mane Braiding Tools
For a secure knot, wrap both pieces of yarn around the bottom of the pigtail while forming a small loop with your index finger.Then feed the yarn ends back through.Pull taut, in a sort of half-hitch knot.

Horse Mane Braiding ToolsThis is what the braids will look like at this stage.

Finish the entire mane in the same manner. There isn’t any hard and fast rule about how many braids are required in a mane, but generally speaking, the more, the merrier. And the fancier.

Now pull-through by inserting the end of the latch hook through the top of the braid.

Once your tool has hold of the yarn tails, gently pull on the end of the braid until it butts up against the horse’s crest.

Be careful not  to pull so hard that the end pokes up through the top of the braid!

Continue with your pull-through down the rest of the braids.

This is what the mane will look like at this second stage. Now you are ready to knot the braids off.

Get Set to Tie Up Loose Ends
To knot your braid off, grasp the yarn tails you just pulled through.
Take one yarn tail in each hand …
Cross the yarn ends under the braid once, then bring the ends back to the top side of the braid about halfway down, where you’ll finish off with a double knot.
As you prepare to knot the braid, here’s a little trick to make the braid lie flat against your horse’s neck.
Tie the first part of your double knot, but before you snug it up, slip your thumb underneath. Press the braid against the crest with your thumb …

Then push upward slightly, enough to form a little bump in the braid. Slide your thumb out from underneath as you snug up the knot.

Doubleknot (using a basic square knot) to secure the braid.

All knots must be dead center or your braids will slant to the side.

Snip off excess yarn, leaving about ¼ inch.

Braiding the Forelock
Horse Mane Braiding ToolsHorse Mane Braiding ToolsHorse Mane Braiding Tools
To finish the mane, braid the forelock. You can simplify things and braid the forelock like the rest of the mane, but if you want to be extra fancy, create a French braid.Tie off the French braid,  pull through,and knot.

How To Plait A Horse's Tail


How To Plait A Horse's Mane

Eight Hoof Care Myths


Like a bike with a flat tire or a tennis racket with a broken string, a horse with poor hooves has limited usefulness. But how to keep a horse’s hooves in their best condition is an often discussed and sometimes hotly debated topic. There are theories regarding horses’ feet that constantly keep horseowners contemplating the fact and fiction of hoof care.
Often misinformation is accepted as truth simply because it has been around a long time. In this article we address a few of the most common misconceptions about hoof care, and ask top experts to explain the truth behind the myths.
Myth: White hooves are softer and have more problems than black feet.
The color of the hoof is influenced by the color of the skin above it, so if a horse has white markings directly above the hoof, the hoof itself may carry the same pigmentation. Many people believe that hooves with black walls are stronger than hooves with white walls.
FarrierMaster Farrier John Burt owns and operates the JDC School of Basic Farrier Science near Texarkana, Ark. He is a member of and tester for the Brotherhood of Working Farriers Association (BWFA) and a 2001 inductee to the BWFA Hall of Fame.
John says, "There is no quality difference on the same horse, no scientific data to sustain any difference. The white and the black hoof are both designed the same structurally; the texture and quality of the hoof is the same."
One of the foremost experts in his field, Doug Butler, Ph.D., of LaPorte, Colo., is the author of The Principles of Horseshoeing, one of the most widely used texts on horseshoeing in the world. He also has 30 years of teaching experience and acts as a consultant and lecturer on horseshoeing. In 1976 while doing research at Cornell University, he conducted a study on white versus black hooves by taking squares of hoof material and crushing them in a compressor.
"There was no difference between black and white," he agrees. "The main difference was in moisture content: The softer hooves fell apart easier." He notes that genetics also play a role in hoof strength. "Some Paint Horses have extremely brittle white hooves and others don’t. Appaloosas seem to have extremely strong feet, no matter what color; genetic propensity seems to be more important than the color of the hoof."
Myth: All horses need hoof supplements added to their feed.
The reason we add supplements is because there is something missing from the horse’s feed. Whether your horse needs a nutritional supplement depends on what you are feeding him; if his diet is nutritionally balanced, supplementation is probably not necessary. And just like people, some horses can thrive on a basic diet, while others struggle to maintain good condition with every expensive feed and supplement known to man.
Some "complete feeds" already include nutrients such as biotin, which is important to all connective tissue, and methionine, an amino acid essential for strong hooves. There are endless numbers of products on the market that claim they will help your horse’s hoof quality; often the best way of finding a supplement that helps an individual is by trying them out and finding one that works.
Doug Butler comments, "There are a few very good supplements on the market, and then there are a lot that are not well researched. I have counted more than 25 products on the market, but the problem is that every animal responds differently."
Talk to your veterinarian about determining what supplements your horse might need. Having your hay and pasture analyzed will help you make an educated decision. However, hoof supplements won’t be a miracle cure for horses in poor condition.
According to John Burt bad feet are often caused by nutrition problems and obesity. "On obese horses the hoof often stops growing because it’s so stressed from carrying so much weight, especially the front feet. I’ve done two horses this year where the wall just was not growing. I got one to drop 250 pounds, and the feet improved."
Other factors that can contribute to poor hoof quality include genetics or undesirable living conditions, such as wet, mucky ground.
Myth: Horses get thrush from standing on wet ground.
Thrush is an infection of the frog and sole of horses. Wet conditions alone will not result in thrush, since bacteria and fungi must be present, but dirty conditions such as stalls not mucked out regularly are certainly a cause of this nasty condition.
Affected feet will have a very offensive odor and will produce a black discharge around the frog. Lameness will result if the condition is allowed to progress far enough to affect the sensitive structure of the foot.
Proper cleaning and trimming of the feet along with proper stable sanitation will help decrease the chance of infection. If you notice that your horse’s feet smell bad and/or have a discharge, cleaning and disinfecting them with a copper sulfate product or iodine solution can treat the problem. A regular trimming schedule with your farrier also helps prevent and control thrush.
Myth: Hot fitting the shoe hurts the horse.Hot shoeing, including hot fitting, refers to the act of forging/fabricating a shoe, and allows the farrier to custom make and fit the shoe to the horse. Hot fitting involves applying a hot shoe to the horse’s hoof, burning the hoof where the shoe is applied and seating the shoe to the hoof.
"Those in favor of hot shoeing say that a well-placed hot set shoe seals the hoof tubules and allows the farrier to see where there is a high or low spot in the foot," explains Bill Reed, a farrier from Columbus, N.C., who shoes horses in the Carolinas and Florida. "Some will argue that burning the foot injures the foot or dries it out, but this is false because there are no nerve endings there. Does it hurt when you trim your fingernails?"
Myth: Oil products help seal in moisture.
There are as many products at the tack and feed stores to keep horses’ hooves in good condition as there are anti-aging creams on the beauty aisle at the local pharmacy. One thing to note is that some products are oil-based and claim to add moisture to the hoof, while others are called sealants and claim to lock moisture in—or out—of the hoof.
Sean Reichle,product manager for Farnam Horse Division, explains, "Oil based conditioners, when used correctly, nourish and moisturize the hoof, which may become dried out because of environment or management conditions. Just like different people’s fingernails require different treatments to keep them in top condition, it is important to assess a horse’s hooves periodically."
Bill Reed is not a big fan of oily hoof dressings, but offers advice on how he thinks they should be used. "Dressing should be applied to the coronary band only," he says. "Then it can be absorbed and moisturize the new hoof growth. But I only apply sealant to the rest of the wall. If you slather dressing all over the hoof, it softens the foot and then in a climate such as Florida, for instance, where the soil is sandy and hot, the feet dry out. If the hoof is constantly wet and then dry it constricts and contracts, and the shoes loosen quicker."
Sean Reichle advises, "In some situations, the use of an oil-based conditioner around the coronary band and sole of the hoof, and a sealant on the hoof wall and nail holes, may be an appropriate hoof care program."
Sean recommends different products for different scenarios. "A horse that spends most of his time out in the field and is only groomed occasionally might benefit from a formula that includes pine tar because it may require less frequent application in harsh conditions and is a bit messy," he explains. "For a horse that is kept primarily in the barn and groomed frequently, a product with a lighter formula that is applied more often would be a better choice."
Whether you use hoof dressing or not, attentive hoof care is a paramount concern. "The best advice is, if the horse is being used then you should clean the feet every day," John Burt says.
According to Doug Butler, the best "hoof conditioner" is the water that the horse drinks and stays hydrated with.
Regardless of the hoof care product you use, follow the manufacturers instructions for application.
Myth: A piece of gravel can work its way up from the bottom of the hoof through the coronary band.
A "gravel" is a condition where an abscess, instead of coming out through the bottom of the foot, works its way upward beneath the hoof wall and breaks out at the soft tissue of the coronary band, where the infection drains out. It is not, however, literally a piece of gravel working its way up the hoof.
"I find that ‘gravel’ is a regional term for describing an abscess," Bill Reed says. "The farther north you go, they say that a horse ‘graveled’ rather than ‘abscessed.’ "
According to John Burt, "Gravitational force and the way that the foot is constructed make it questionable that an actual piece of gravel can travel up there. Look at the structure of the foot and figure out the gravitational force: It pushes down. When an abscess is created, the pressure is pushing it up the foot."
He reasons, "If you did find a piece of gravel in an abscess, it was driven in from the bottom, and then the abscess itself pushed it up through the coronary band."
Myth: Factory shoes have four nails holes on each side, so each hole should be utilized.
Shoes can be nailed on with as many nails as necessary to secure the shoe to the hoof. Sometimes two per side are sufficient on a smaller foot or a nail pattern that takes advantage of the stronger points of the hoof wall, bypassing the weaker section. Clips can also be used to hold a shoe on.
"The nail holes in keg shoes are there as options, not to be filled up," Bill Reed says. "Some shoes have eight or 10 holes—aluminum shoes have 12. I did one horse last year that someone else had shod with 11 nails in one shoe. That was incredible! I think three nails were clinched together. That’s just overkill."
Hooves constantly grow and change, and sometimes parts of the hoof are healthier than others. Nails must be driven into solid healthy wall, or they will not provide a secure hold. On improperly cared for hooves, the hoof wall may be in such poor condition that a farrier can’t nail a shoe on or may only be able to place a couple of nails on each side. The hoof grows very slowly, about a 1/4 inch per month, requiring from six to nine months to grow out completely. Because the hoof grows so slowly, it is preferable to prevent damage, rather than to try and repair damage once it has occurred.
Myth: Barefoot horses need farrier attention less often than shod horses.
Some experts suggest pulling a horse’s shoes for half of the year to let the hooves "recover" from shoeing, including letting the nail holes grow out. If the conditions are right, the farrier will have a better hoof to work with when the horse starts wearing shoes again.
"This is a good idea if you’re not riding the horse and the footing is good," Doug Butler says. "Out here in Colorado our pasture has a lot of crushed granite so that wouldn’t really work because the horse’s feet would wear down too much."
For horses doing a lot of work, removing the shoes may be impractical. When wear exceeds growth, then shoes are necessary for a sound horse. Also, corrective horseshoes can be helpful for horses with specific soundness problems. Shoes can also provide extra traction in slippery conditions, especially when they are drilled and tapped so that studs can be used.
If you do remove the horse’s shoes, don’t just turn him out for six months and forget about him. R.T. Goodrich, who has a four-shoer practice in Petaluma, Calif., explains, "Horses in a corral or pasture need regular hoof care at six- to eight-week intervals, shod or not. Uneven wear affects the horse’s entire body, not just the feet."
Consider your horse’s lifestyle and take into consideration the above factors. Then consult your farrier to decide what is best for your horse.  

Flu Signs

Identify common flu symptoms in horses.

If your horse travels or is exposed to unfamiliar horses on a regular basis, talk to your veterinarian about regular immunization against equine influenza. While it’s true that influenza viruses do evolve to bypass the horse’s immune defense, you can provide some short-lived protection through vaccination.

But vaccinate before your horse gets sick. Signs that your horse may be suffering the flu are similar to those we get when we come down with a common cold: dry cough, runny nose, fever, depression and loss of appetite. Like the common cold in humans, treatment for equine influenza includes lots of rest; most horses recover in about 10 days, but some require several weeks for recovery.