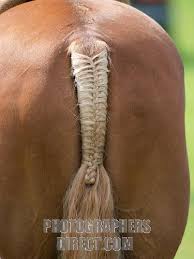
 To achieve the best results you need a full, untrimmed tail with plenty of length to the hairs at the top of the tail. The secret of success is to keep the hairs evenly spaced. Try to include an even amount of hair from each side, all the way down the length of the dock. The braid formed down the center of the tail must be kept straight and tidy for maximum effect.
Take sections from both sides. Braid down center for two thirds of dock.
The finished tail looks neat and tidy with the actual braid kept centrally spaced down the tail.


If you grew up riding hunters 20 years ago, chances are you mastered the art of braiding a hunter’s mane. It was simply part of a show horse’s turnout. But with non-rated divisions allowing today’s riders to forego braiding, the ability to braid well is disappearing. A beautiful coiffure on a modern show hunter is now often left to the skillful hands of a professional groom. However, you can still make your horse look like a national champion, even if you’re competing at a schooling show. Just follow these step-by-step tips.
 |
Assemble an assortment of braiding tools: 4-ply yarn cut into strips 12-inches long (for our photographic purposes, we’re using a contrasting color), a latch hook (bought at any craft store), a plastic alligator hair clip, a mane comb, scissors and a spray bottle of water mixed with a styling gel or braiding solution. |
 | Make sure you’re braiding a mane that’s freshly shampooed, free of coat polish—that’ll only make it slick—and pulled and thinned to about 4 inches. |
 | Thoroughly dampen the first third of the mane with the solution. |
 | Using the comb, make a part about one-inch wide. Each braid needs to be the same width against the top of the horse’s crest. Snap the clip on the neighboring hair to hold it out of your way. |
 | Begin braiding. Keep even tension on the hair, making sure that you pull down on the mane as you braid. If you pull the hair toward you, the finished braids will stand away from the horse’s neck. |
 | About half-way to the end of the braid, add a piece of yarn that’s folded in half. |
 | Meticulous braiders make a note of how many crossovers they make in a braid before they add the yarn. This adds a consistent look to the finished job. |
 | Split the yarn tails so that they each go in separate sections of the braid .. |
 | … then braid all the way to the end of the hair. |
 | Wrap both yarn tails around the braid and knot once. Make sure you pinch the end of the braid with the fingers of one hand while you knot with the other. This will prevent the braid from unraveling. |
| Tying the Knot |
 |  |  |
| For a secure knot, wrap both pieces of yarn around the bottom of the pigtail while forming a small loop with your index finger. | Then feed the yarn ends back through. | Pull taut, in a sort of half-hitch knot. |
 | This is what the braids will look like at this stage. |
 | Finish the entire mane in the same manner. There isn’t any hard and fast rule about how many braids are required in a mane, but generally speaking, the more, the merrier. And the fancier. |
 | Now pull-through by inserting the end of the latch hook through the top of the braid. |
 | Once your tool has hold of the yarn tails, gently pull on the end of the braid until it butts up against the horse’s crest. |
 | Be careful not to pull so hard that the end pokes up through the top of the braid! |
 | Continue with your pull-through down the rest of the braids. |
 | This is what the mane will look like at this second stage. Now you are ready to knot the braids off. |
| Get Set to Tie Up Loose Ends |
 | To knot your braid off, grasp the yarn tails you just pulled through. |
 | Take one yarn tail in each hand … |
 | Cross the yarn ends under the braid once, then bring the ends back to the top side of the braid about halfway down, where you’ll finish off with a double knot. |
As you prepare to knot the braid, here’s a little trick to make the braid lie flat against your horse’s neck.
 | Tie the first part of your double knot, but before you snug it up, slip your thumb underneath. Press the braid against the crest with your thumb … |
 | Then push upward slightly, enough to form a little bump in the braid. Slide your thumb out from underneath as you snug up the knot. |
 | Doubleknot (using a basic square knot) to secure the braid. |
 | All knots must be dead center or your braids will slant to the side. |
 | Snip off excess yarn, leaving about ¼ inch. |
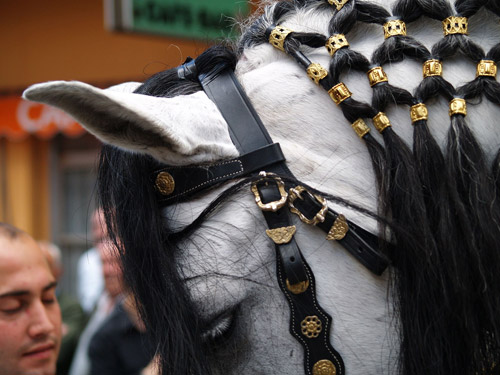
| Braiding the Forelock |
 |  |  |
| To finish the mane, braid the forelock. You can simplify things and braid the forelock like the rest of the mane, but if you want to be extra fancy, create a French braid. | Tie off the French braid, pull through, | and knot. |
How To Plait A Horse's Tail
How To Plait A Horse's Mane


No comments:
Post a Comment